Online Bidding for Subcontractors (BOBS) – Trade Contractor Guide
How Can We Help?
Online Bidding for Subcontractors (BOBS) – Trade Contractor Guide
Welcome to our BidCentral Online Bidding for Subcontractor (BOBS) Guide. This guide is intended to provide an overview of the features and tools available to you as a Trade Contractor.
1. Getting Started
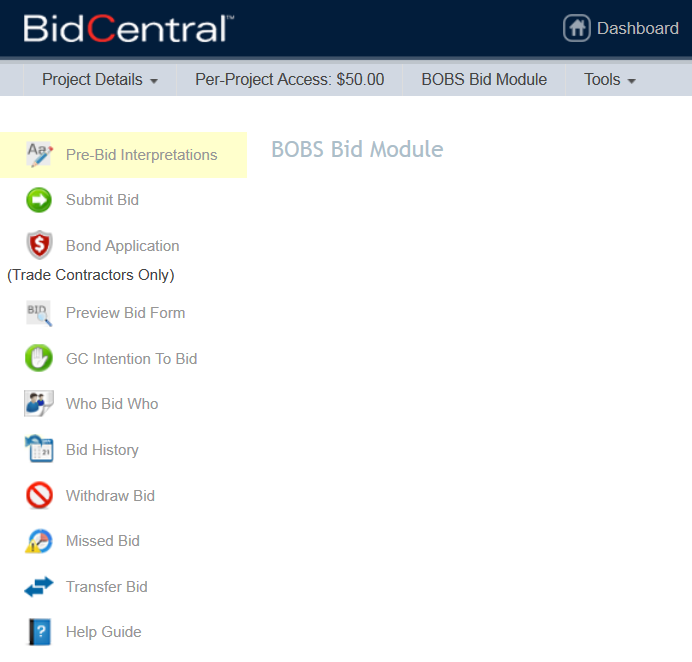
Once you access the “Bid Module” by clicking on the bid module icon in a specific project, you will be presented with a series of tools that will allow you to proceed through the bidding process and bid on the project.
2. Submit Bid
The submit bid tool allows you to submit a bid by completing the bid form(s) that were created for the project. Clicking on this icon, you will be able to go through the steps and submit your bid. Bid forms are available about one week prior to the bid closing.
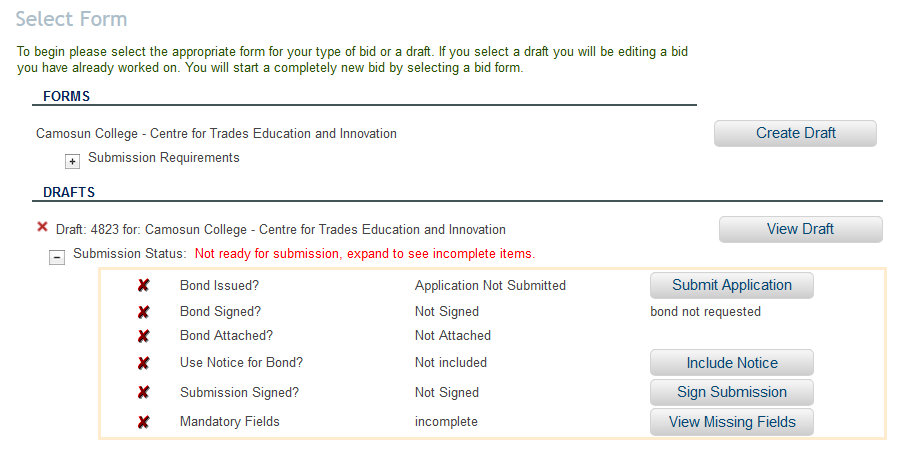
1. Select Form
To Start, select the form you will be bidding on and click next.

If you already have a draft started and would like to edit it, you can select it and click next.
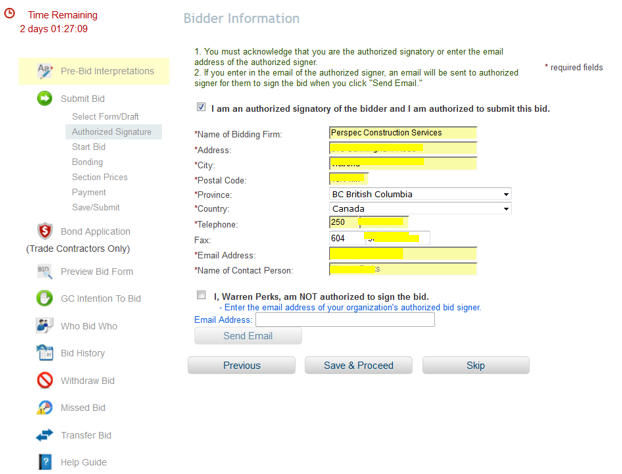
2. Bidder Information
This information will appear automatically on the bid form. You must acknowledge that you are an authorized signatory of the bidder and are authorized to submit the bid in order proceed with the bid submission. Or you may forward the bid to the authorized signatory for their signature by using the box at the bottom of the Bidder Information page.
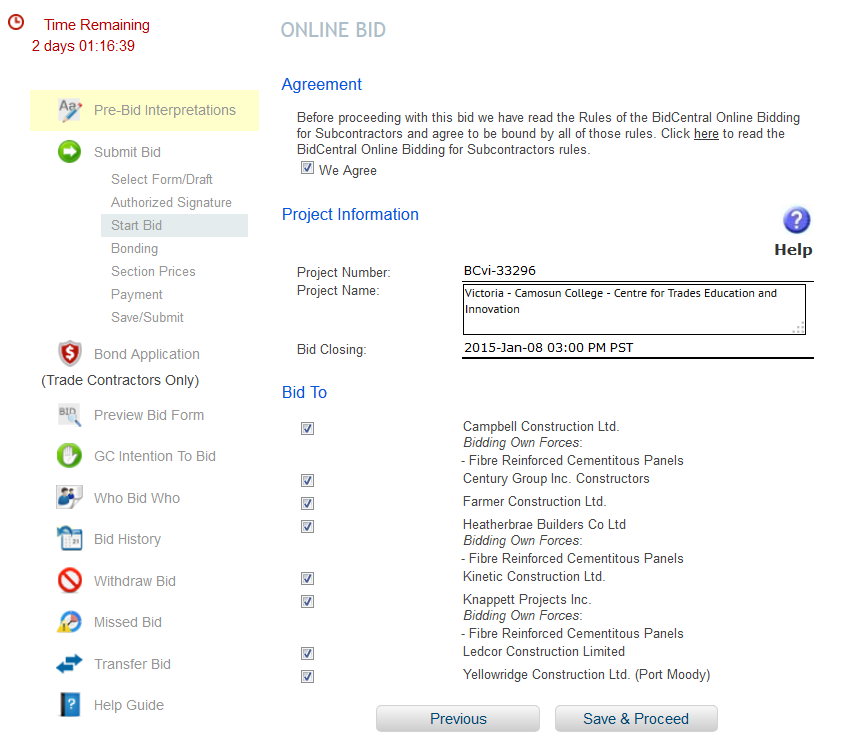
3. Selecting Bid Recipients
The third step is to select which company you will be bidding to. If you know which companies that you are bidding to, you can select them. You can proceed without selecting a company but before you can submit the bid you will have to select at least 1 company that you are submitting the bid to. You may provide different bids to different companies by choosing those you wish to bid as one price with one draft. Then you create another draft for those you wish to submit a different price.
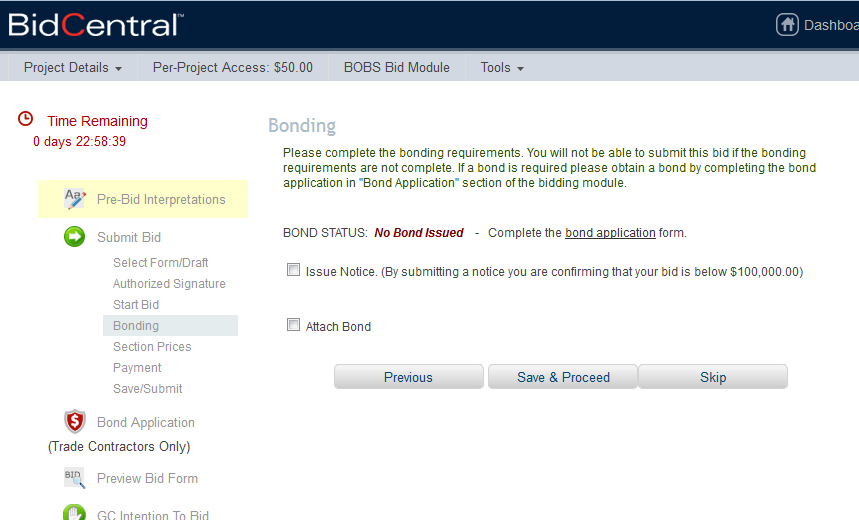
4. Bonding
We strongly advise that you make the bonding application as soon as possible to ensure that you avoid any last minute impediments that prevent you from getting your bid in on time.
If there is a bond requirement the bidder will be required to go through a Signature Verification process
The bonding aspect of the bid can be completed by issuing a notification (if applicable – this may not be available on the form) or by attaching a bond. In order to attach a bond with your
5. Sections and/or Divisions
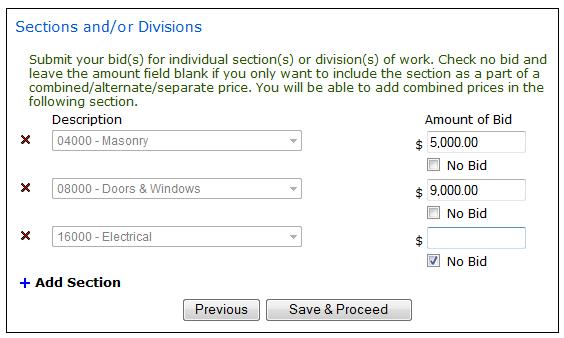
You must select the sections and/or divisions that you are bidding on. You must select at least 1 section. If you are intending to only include the section as a part of a combined price, you can leave the amount field blank and check “No Bid” and proceed to the next step.
6. Combined Prices
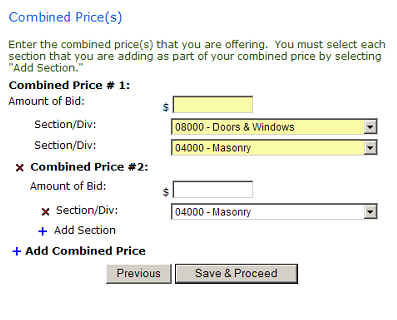
You can submit 1 bid for multiple sections. Mandatory combined prices are marked with a yellow background and you must enter a bid amount in order to proceed.
7. Define Separate Prices
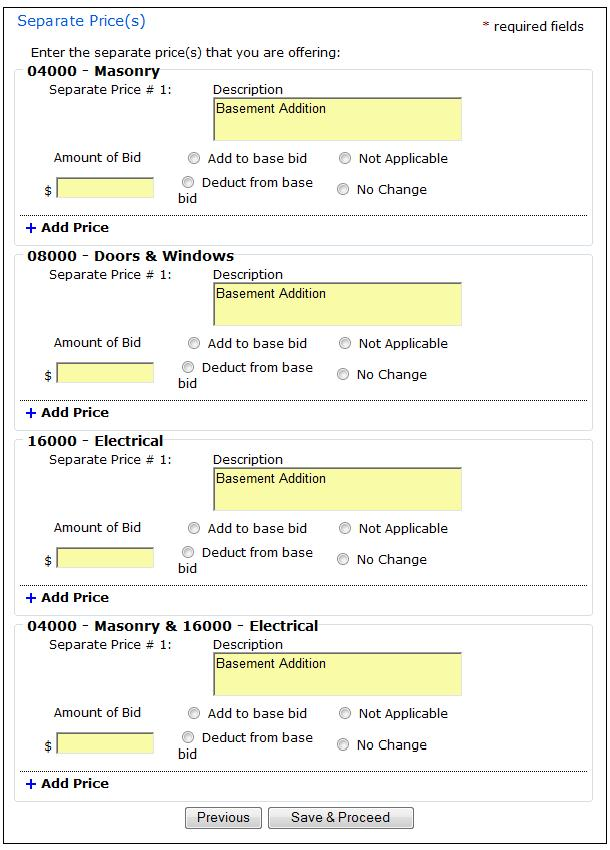
For each section that you are bidding on and combined price you are offering, you can enter separate prices. You must decide whether the price you are offering will be “Added to the base bid”, “Deducted from the base bid”, or does “Not Change the base bid.” For mandatory separate prices (marked with a yellow background) you must enter a price and choose an option or mark it as “Not Applicable.”
Note: these prices will not appear until you have inserted a $ amount on the forms shown in 2.5 and 2.6 of this guideline.
8. Define Alternate Prices
For each section that you are bidding on and combined price you are offering, you can enter alternate prices. You must decide whether the price you are offering will be “Added to the base bid”, “Deducted from the base bid”, or does “Not Change the base bid.” For mandatory alternate prices (marked with a yellow background) you must enter a price and choose an option or mark it as “Not Applicable.
Note: these prices will not appear until you have inserted a $ amount on the forms shown in 2.5 and 2.6 of this guideline.
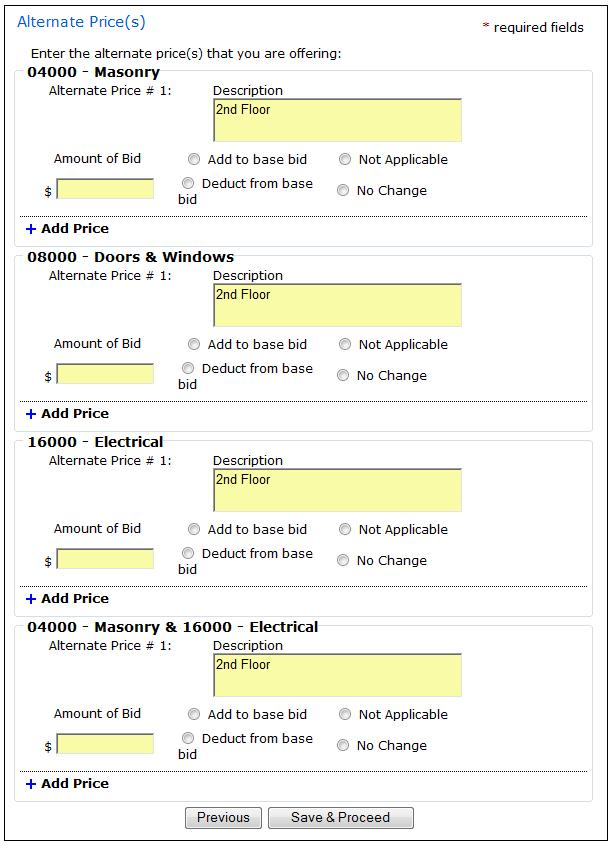
Should there be a need to add an Alternative Price which is not on the Bid Form you can do so by selecting ‘+ Add Price
9. Define Unit Prices
You can define prices that are offered in units such as unit prices and supply items. First, select the section that the price pertains to, and then provide a description and unit for the price. Once you enter the quantity and amount for the price,
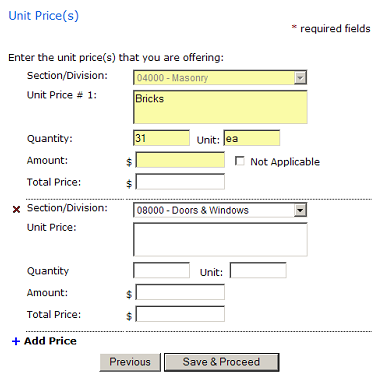
Should there be a need to add a Unit Price which is no on the Bid Form you can do so by selecting ‘+ Add Price’. This will accommodate the addition of any Unit Prices that must be added for any combination of bids submitted.
Should you wish to provide a unit price which is an addition and a different price for a deduction, you will have to create each option separately by providing the appropriate description in the description field.
10. Define Cash Allowances or Other Stipulated Sums
You can define the cash allowances or other stipulated sums for your bid. For each
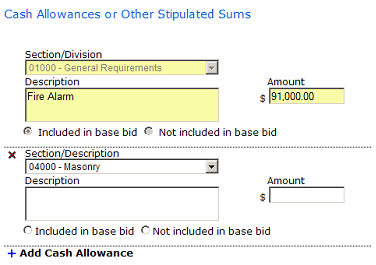
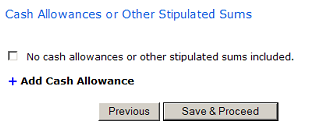
If you are not providing cash allowances or other stipulated sums, you must acknowledge that cash allowances or other stipulated sums are not included with your bid.
11. Define Attachments
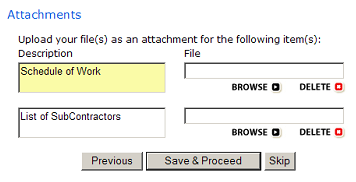
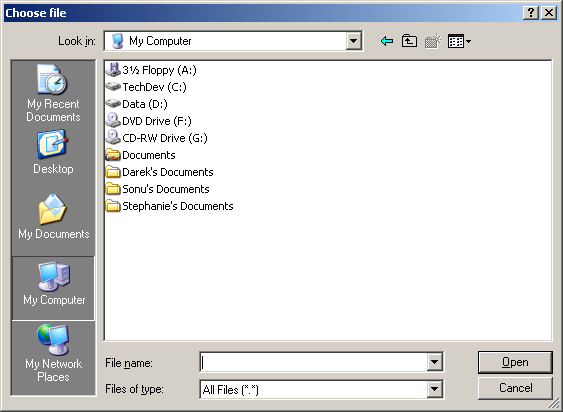
For each attachment that is defined for the bid form, you can attach a file to meet the requirement. Once you click on browse, you will be able to select a file on your computer and attach it with your bid submission. Mandatory attachments are marked with a yellow background and you must attach a file.
12. Payment
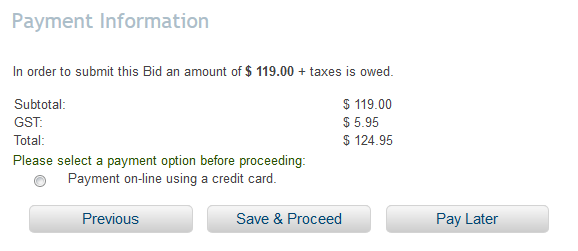
The payment portion of the bid must be completed in order to submit your bid:
- It is recommended you do this in advance of the bid submission deadline to ensure there are no problems at bid closing time.
- You can pay using a credit card (MasterCard or Visa) or a PayPal account.
- The fee is paid only once per project regardless if you submit different bids to different General Contractors.
13. Submit Bid
Before submitting your bid, you can view a summary of your bid. You must also agree to all of the terms and agreements of the bid as defined in the bid form.
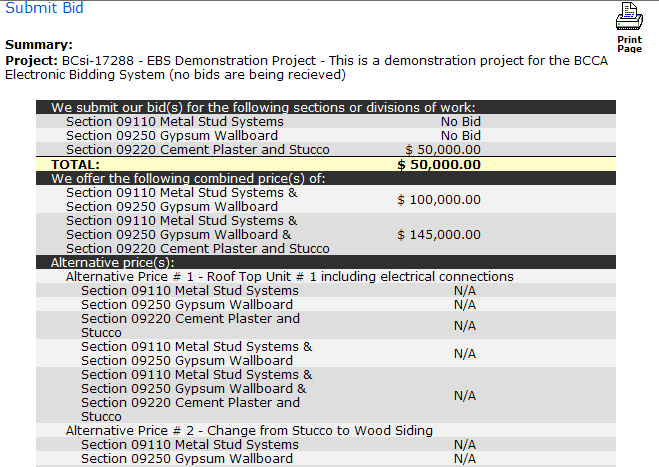
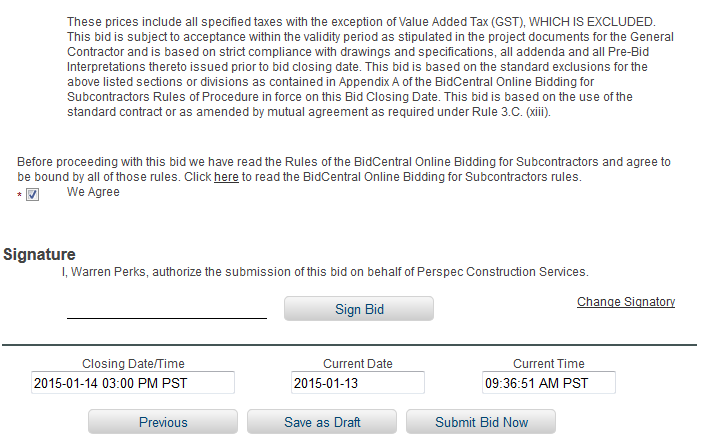
Submit bids once you have chosen to bid to all the General Contractors you wish to. Once you have chosen to submit your bid you will receive an email from the system advising you of receipt of your bid. As well in the Bid Module you can view the bid under the ‘Bid History’ icon.
Should you want to amend your bid and make changes to it after you submit it (prior to closing) you may do so by using the ‘Withdraw Bid’. Once your bid is withdrawn it will reappear as a draft.
3. Withdraw Bid
You may withdraw your bid before the bid closing date and/or after the bid closing date within a specific time period as stipulated in the BOBS Rules of Procedure.
1. First select the bid you would like to withdraw:
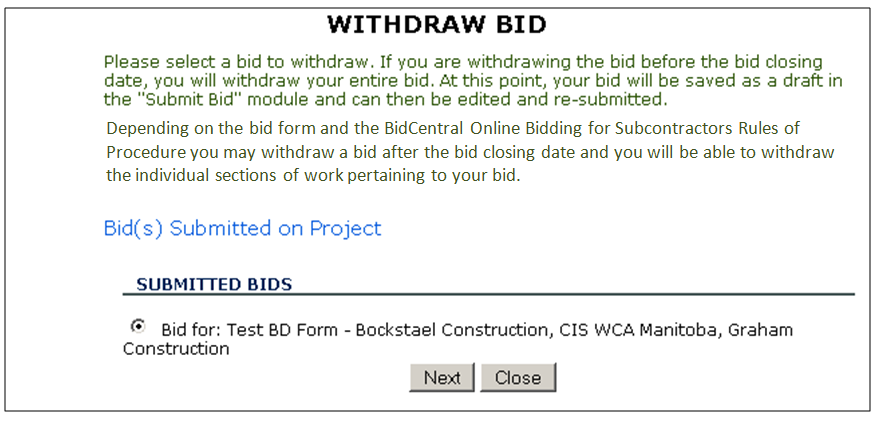
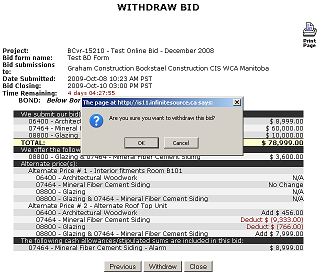
2. If you are withdrawing your bid before the bid closing, your entire bid will be withdrawn once you select the withdraw button. The bid will be re-saved as a draft in the “SUBMIT BID” section and can be edited and re-submitted. There is no fee for withdrawing a bid before the bid closing date.
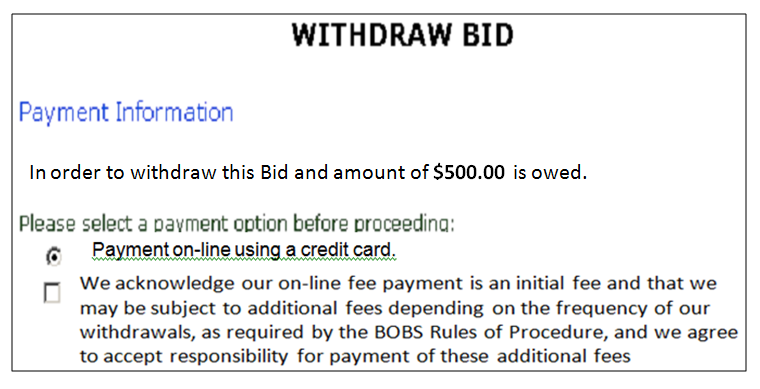
You will be required to pay the withdrawal fee for withdrawing your bid after the closing date as per the BOBS Rules of Procedure.
4. Missed Bid
If you have not submitted a bid to one or more general contractors, you can use the “Missed Bid” tool to submit a duplicate bid that you have submitted other general contractors.
1. First Select the bid you would like to re-submit
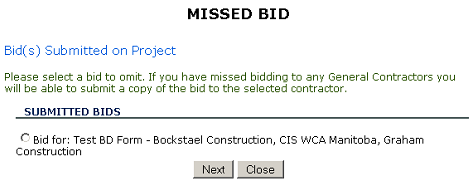
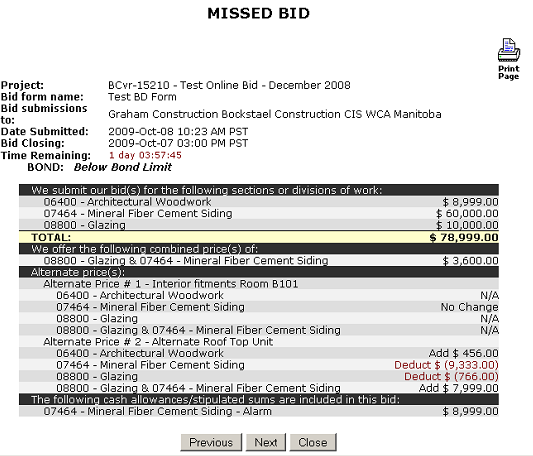
2. Next, you will be displayed a summary of the bid that you will be re-submitting.
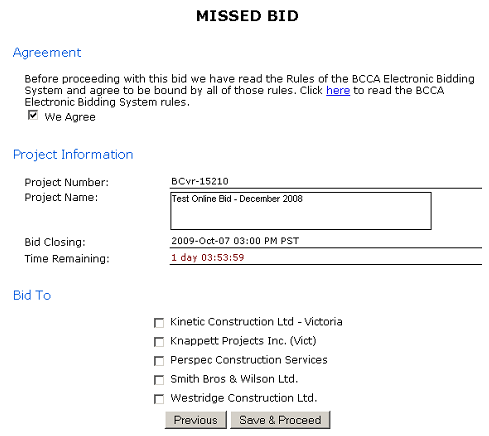
3. You must then select the contractors that you would like to submit the duplicate bid to.
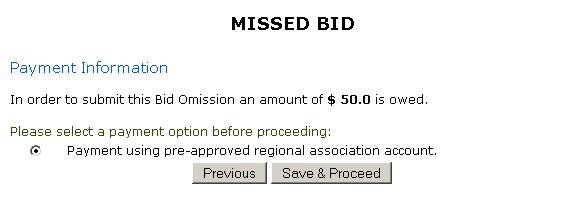
4. You will be required to pay the fee for submitting your missed bid as per the BOBS Rules of Procedure.
5. Transfer Bid
If you would like someone other than yourself to submit the bid on behalf of your company you can transfer your bid data. All of the drafts and bonds pertaining to the project can be transferred to another member of your company.
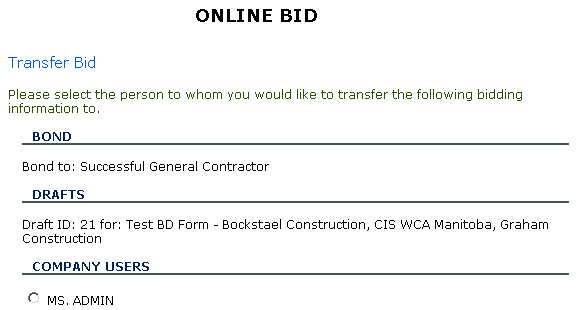
To transfer your bid, select the company user to whom the information is to be transferred and select “Transfer”, and your data will be transferred.
6. Bond Application and Signature Verification
1. Bond Application
In order to obtain a bond on the project, you must complete at a minimum the required fields of the “Bond Application” and submit the application to a bonding agent. As well the application will go to the person in your company who has their Signature Verified in order to sign the bond if the person submitting the bid is not signing the bond.
If not done so already, the party signing the bond will be required to go through a Signature Verification process as described in 6.3.
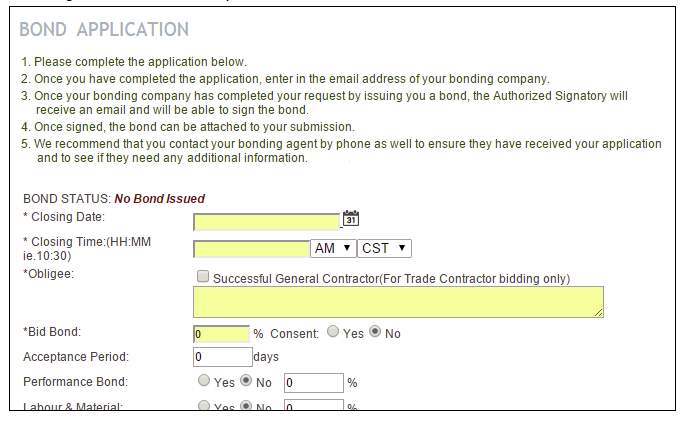
Note that the Bond Form defaults to the BidCentral Online Bidding for Subcontractors and should not be changed. Consent of Surety is not required.
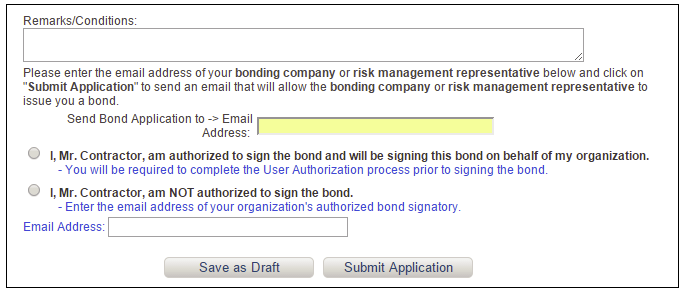
Once you have filled in all of the details that are necessary for you to obtain the correct bond, go to the bottom of the form and enter the email address of your bonding company or risk management contact within your company.
The last step is to determine who will be signing the completed bond. Select the appropriate radio button stating that you ARE or ARE NOT signing the bond on behalf of your firm.
If you are signing the bond, enter in the email address of the individual that will be singing the bond in the field at the very bottom of the page. When you submit the form, both the Broker and the bond signer will receive an email informing them of your bond request.
If you are not yet ready to submit your application, you can Save the form as a Draft and return later to finish and submit it.
After you have submitted the application, you will receive an email when your bonding agent has issued the bond. If you require someone else to sign the bond, you will receive the email once they have signed it. The bond will be then available in the Submission Manager where you will be able to attach it to your submission.
If the information on your bond is not correct, or for some
2. Signing and Attaching the Bond to your Submission
When submitting a bond online with your bid, you are not required (or able) to put a ‘wet’ signature on the bond,
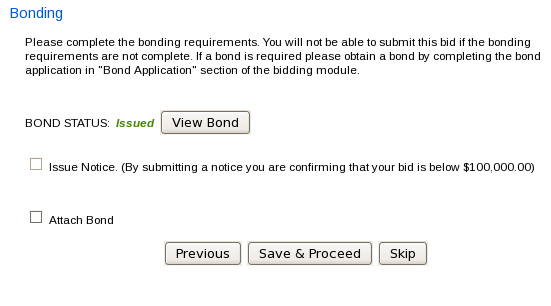
The bonding section of the bid is completed by signing and attaching a bond. In order to attach a bond with your
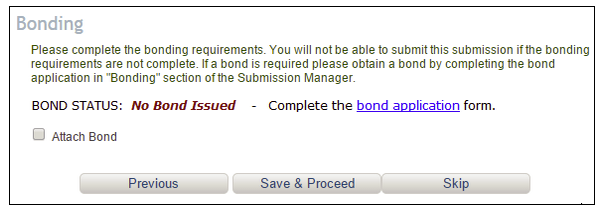
Once your bond has been signed, sealed and issued by your Bonding Agent, it will need to be signed and attached to your online submission. If you are signing for your firm, you can sign and attach the bond from this page or from the Bond Application form. If you are not signing the bond, you would have entered the signatory’s email address on the bond application form for them to sign prior to you receiving the bond to attach to your bid.
If the bond is not yet signed when you get to this page of the bid form, click the Sign button to place your digital signature on the bond. Once signed, click View Bond to ensure the document is accurate prior to attaching it to the submission. If all of the information and signatures are correct, check the box next to Attach Bond then click Save and Proceed.
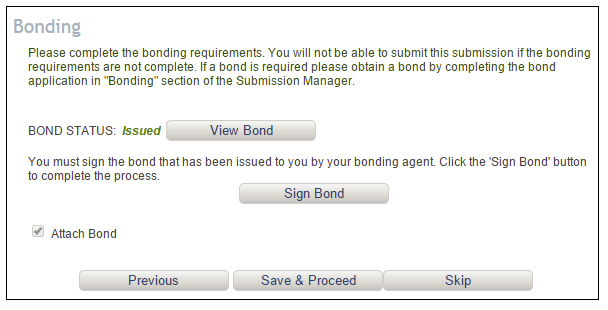
3. Bond Signing Verification
If the person making the bond application is different from the person signing the bond and they have not already had their signature certified they will be required to complete the Signature Verification process. This will require them to obtain a login and password if they do not already have one.
Once you have completed the bond signing verification it will be good for the time period selected.
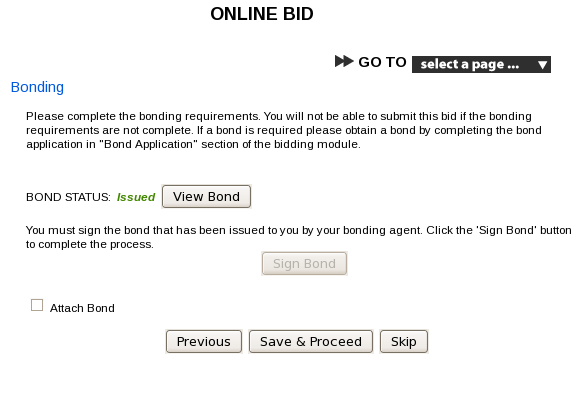
If you are the person submitting the bid but are not signing the bond you will only be able to view the bond in the bid module.
Bid Submission Guide
Click here to see a sample BOBS Bid Submission Schedule.
